EEEEC: Isabel Maria’s heraldic camp chair

EEEEC: Isabel Maria’s heraldic camp chair

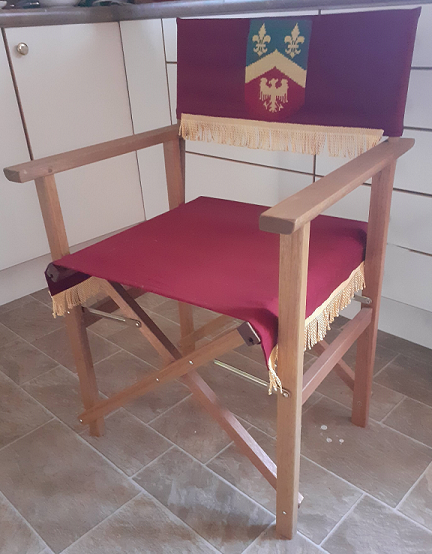
A chair, with personal heraldry, is shared under the categories of personalisation, preparation, transformation, inspiration, and imitation. (Or should that be approximation?) Isabel Maria describes the project:

“At Canterbury Faire 2023 it became clear my trusty chair was now rickety, having reaching the end of its usable life, and needed to be replaced. In preparation for this day I had purchased a new directors chair some time ago (on sale) and put it aside. Before Canterbury Faire 2024 I brought it out with the intention of transforming it into something that was clearly inspired by 16th century seating, and also recognisably mine, through the use of my personal heraldry

Inspiration

I started a simple embroidery of my arms at CF’23 as a fun time-filler activity. After I finished it I realised that I had really enjoyed the process, but that I did not like the proportions of the finished item. So, I made a pattern changing the angle of the chevron and reducing the height of the eagle and fleur de lys, and made a new one. The vague hope had always been to apply the finished item to my chair in some way.

There are several styles of chair that have the arms on the back, as can be seen on this pinterest board. Most are folding or “hip joint” style chairs, both of which are considerably more complicated and decorative that the chair I used, so any similarities need to come from the fabric and trim.

Materials and Construction

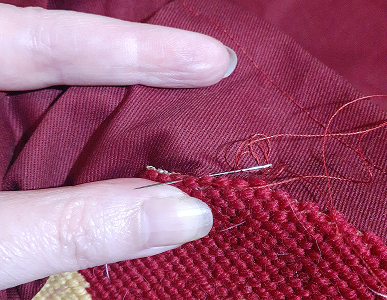
Many of the materials used in this project were items from stash (canvas, wools, fringe, thread) or purchased inexpensively (drill). Much of the construction is completed by machine to save time and keep the project moving. Fringe was sewn on in the placement seen most commonly on the hip joint chairs. The embroidery was basted in place on the back rest, as seen in several hip joint chairs, before being hand sewn to the burgundy drill.

Verdict and Next Steps

After considerable testing at Canterbury Faire 2024, I can declare this previously prepared chair comfortable, and easily recognisable. However it still seems a little, … plain. The next step is to make a fringed cushion, probably with my heraldry on it, to add more luxury and ‘bling’.

EEEEC: Emrys Grenelef’s Six-board Chest

EEEEC: Emrys Grenelef’s Kubb Chest

An entry for Personification, Transformation, Imitation and Preparation is described by Emrys:

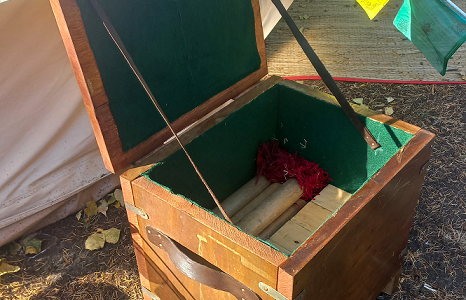
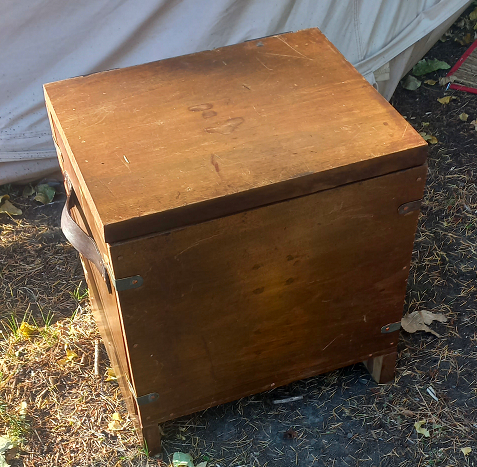
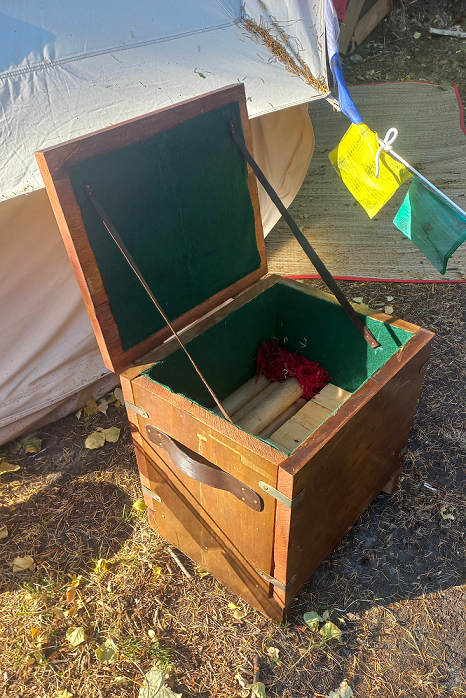
“We had some old timber lying around from a dismantled piano. The timber was a little rough but the 2 boards were over a foot in width so I decided to upgrade my Kubb box. I went with a basic six-board chest.

“I based my design on the six-board chest found: https://www.greydragon.org/library/chests.html“I based my design on the six-board chest found: https://www.greydragon.org/library/chests.html

I cut each board into thirds, this left me with six boards at 420mm x 350mm x 25mm.
I then cut two notches (350mm x 25mm) out each side of the two side boards, to act as a shelf for the front and back boards.
The bottom board was trimmed to 370mm x 300mm x 25mm.
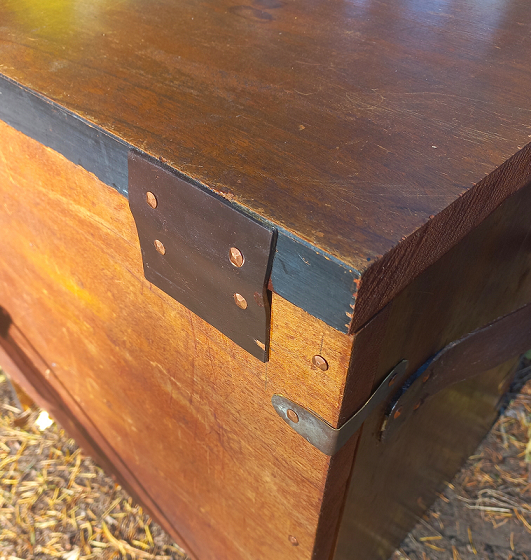
I then nailed the five boards together using square copper nails.
I found some old wood stain and stained the visible cut edges of the boards.
Next I got an old sheet of brass and cut out eight reinforcing straps, this brass looked aged and I left it as such.


I then got some heavy weight leather and cut out two pieces for handles and two pieces for hinges and then dyed them with a generic dye from Mister Minit.
I cooked a small batch of rabbit skin glue and glued the leather in place.
Then I nailed all the straps, handles and hinges in place and bent over any nail tips that were protruding.
Next was laying the felt inside the chest, I bought some cheaper felt blend from spotlight but the widths that were on offer meant that I couldn’t lay one piece inside the chest and had to settle for two pieces on the inside and two pieces for the lid.
I then made another larger batch of rabbit skin glue and glued down all the felt.
Lastly I cut out two light weight pieces of leather for stays and nailed them in place to the lid and the side boards.

The chest is a little rough around the edges but serves well as a Kubb set holder and a seat.

I am looking forward to making a larger, grander chest.

EEEEC: Ailith Ward’s German Ensemble

EEEEC: Ailith Ward’s German Ensemble

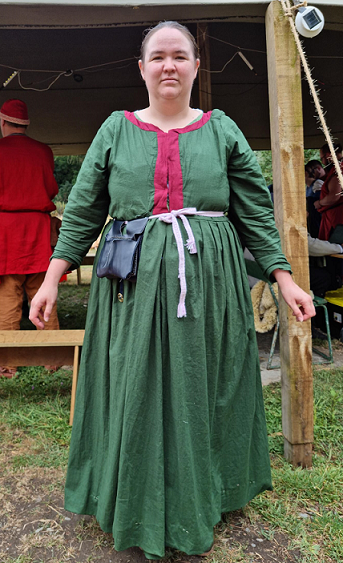
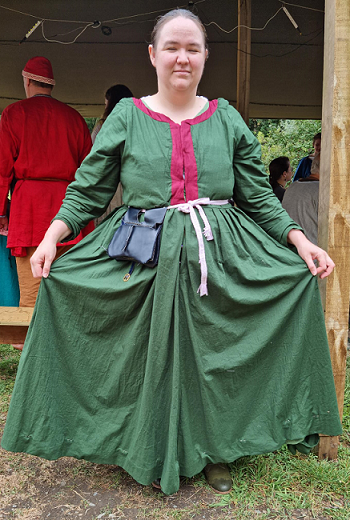
This sixteenth century German ensemble is entered under personification. Ailith describes the project:

“As of Christmas 23 I finally settled on a persona time and place.

“This is my first ever attempt at making 16th C German garb, including Hose, a Hemd, an Unterrock and a Rock.

“I used Mistress Rowan’s Rowan Tree Workshop to create the patterns, as well as one of her PDF tutorials on making a pattern for 16th C hose, which made them seem quite a lot easier.”I used Mistress Rowan’s Rowan Tree Workshop to create the patterns, as well as one of her PDF tutorials on making a pattern for 16th C hose, which made them seem quite a lot easier.

“I was not quite so competent with the 3 dress layers, but I am extremely pleased with them as a first attempt, and intend to both adjust these until they fit right, and make more when I have more than a single month to make all three…”

EEEEC: Ginevra’s article on hand sewing

EEEEC: Ginevra’s FTT Article on Hand Sewing for Beginners

To see the article, entered into this challenge under the category education, as published in From the Tower, please follow this link. Otherwise, read on…

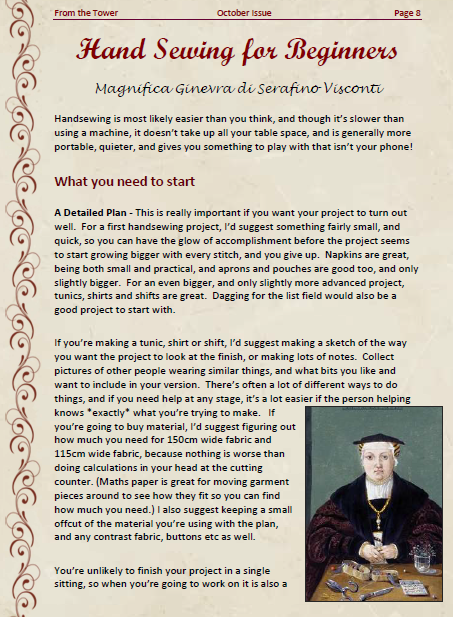
Handsewing is most likely easier than you think, and though it’s slower than using a machine, it doesn’t take up all your table space, and is generally more portable, quieter, and gives you something to play with that isn’t your phone!

What you need to start

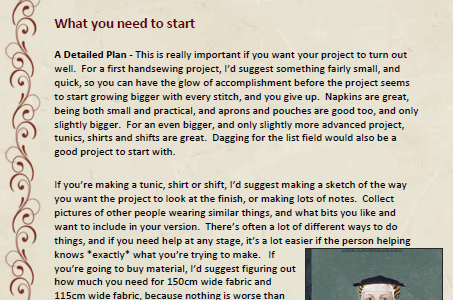
A Detailed Plan – This is really important if you want your project to turn out well.  For a first handsewing project, I’d suggest something fairly small, and quick, so you can have the glow of accomplishment before the project seems to start growing bigger with every stitch, and you give up.  Napkins are great, being both small and practical, and aprons and pouches are good too, and only slightly bigger.  For an even bigger, and only slightly more advanced project, tunics, shirts and shifts are great.  Dagging for the list field would also be a good project to start  with.  

 If you’re making a tunic, shirt or shift, I’d suggest making a sketch of the way you want the project to look at the finish, or making lots of notes.  Collect pictures of other people wearing similar things, and what bits you like and want to include in your version.  There’s often a lot of different ways to do things, and if you need help at any stage  it’s a lot easier if the person helping knows *exactly* what you’re trying to make.   If you’re going to buy material, I’d suggest figuring out how much you need for 150cm wide fabric and 115cm wide fabric, because nothing is worse than doing calculations in your head at the cutting counter. (Maths paper is great for moving garment pieces around to see how they fit so you can find how much you need.) I also suggest keeping a small offcut of the material you’re using with the plan, and any contrast fabric, buttons etc as well. 

You’re unlikely to finish your project in a single sitting, so when you’re going to work on it is also a good thing to have in your plan – if you’re only sewing at the hall on Sundays, it  will take longer than if you work for ½ an hour every evening, but if you’re likely to want to check with a more experienced person regularly than the hall might be a good choice.  Only you know what you’d be most comfortable with, so there are no wrong answers.

Once you don’t have to think about every stitch, I’d suggest lining up some entertainment with regular, planned breaks built in. As you reach the age of …maybe not discernment but definitely nurofen, scheduled breaks give you a chance to at least roll your shoulders and stretch your hands, arms and back before you start getting all regretful that you didn’t do that earlier.  There are some suggestions for listening that I’m enjoying elsewhere in this issue.

Making your plan can take longer than you think, or be sorted in a single conversation.  So long as you have one before you cut anything, you’re all good.   Which brings us to….

Scissors –  both big, for cutting out fabric; and small and pointy for trimming threads, and clipping into curves, when you get to sewing them.  To start with, you probably have something around the house that will work just fine, for example, nail scissors are a great size for thread trimming.

Needles – it’s worth spending money to get good ones even for your first project.  Good needles, like those made by John James or Bohin, are usually around 5-7 dollars a packet, are nice and sharp, which makes sewing easier, and have nice smooth eyes that won’t munch up your thread so it snaps all the time, which is a real nuisance till you get good at threading needles. Some needles are gold plated around the eye – I’ve never found it makes any difference to how smooth the eye is. I personally like small ‘quilting’ needles, but what size and type you get really comes to personal preference.  You will eventually wear the plating off, and get a nice curve in your needle as you use it.  This is a sign to check that the needle is still smooth and sharp, or get another one from the packet.

Thread – here’s the other place where spending a little extra makes a big difference.  Good thread will not randomly knot or break as often as cheap thread, thus saving you hours of angst, and possibly saving your project from being hurled across the room and living in the naughty corner till you shift house.  Mettler and Gutermann threads are both worth the money, and pretty easy to find – I prefer Gutermann because you can take the bottom off and put your needle inside the tube – which makes it far less likely that the needle will migrate and either stab you when you pick up the project again, or just vanish.  Either way, pick a colour that’s as close to matching the fabric you’re going to use as you can get, because any weird looking stitches you make won’t stand out so much.  Later on, I’m going to talk about basting, which is another good way of not getting accidentally stabbed, and you don’t need good thread for that – the cheap thread from the supermarket will work just fine, so if you’ve already got that, you’re ahead of the game.

Thimble – If you’re not playing a stringed instrument for hours a week, you probably want one of these.  They’re available in a range of materials, in a range of styles and sizes, at a range of prices from a couple of dollars to …. Rather a lot,  and there’s even ones for people with fake nails, so there really is a thimble out there for everyone.  I like the ones like little metal fez’s, and I’d suggest having one that goes over the top of your finger for your first few projects, because having a needle skitter off a ring thimble and go up underneath your nail is not something I want to have happen to anyone I like.  As well as protecting your fingers from being stabbed to shreds, thimbles also help you sew with smoother movements, and that saves your joints.  Find one that fits the second finger of your dominant hand, because it’s easiest to use your first finger and thumb to guide the needle to the right spot, and the next finger for pushing, as shown in  https://www.youtube.com/watch?v=gkAlOprpD5E 

Finally, a zip lock bag, or a cookie tin,  to put all the above in.  You don’t have to go with either option, but you do want a way to keep everything together, because running around the house looking for the scissors does not get your project finished.

Getting Started

You could, easily enough, put a knot in the tail end of your thread and start sewing, but…. What happens when you get to the other end?  Making a knot there isn’t so simple.  To make things harder, sometimes the starting knot will pull through the fabric too, and stacking them up to make a knot big enough to not pull through isn’t as easy as making the first one.  So… for a method that is guaranteed not to pull through, and done equally as easily at both ends, try the following technique.  Make a tiny stitch a couple of mm long (leaving a small tail if you’re at the starting end).  Make a second stitch right on top of the first one.  Make a third stitch in the same place, but put your needle through the loop this time, so it’s caught down.  Then either start stitching if you’re at the start, or trim the thread leaving a short tail if you’re at the end, and your thread will stay secure!

The most useful stitch for handsewing is whip stitch.  You can make entire garments using only this stitch, and it’s pretty quick, and very straight forward.  Put the stitches close together and you’ve got an excellent way of reinforcing an area, spread them out and you’ve got a nice quick seam that doesn’t need a straight line pre-marked. Want to finish an edge nicely?  Turn the edge under twice if the fabric frays, or once if it doesn’t, and whip stitch the edge down (the third link may be helpful). If you’re making a garment with fabric that frays, like a linen shirt, consider doing this to all the pieces before you start sewing them together.  Want to add a lining?  Make it the same as you did the outer, and whip stitch the layer together. Want to add trim? Whip stitch it down close to the edge, or whip across a strand of yarn and call it couching.  Easy.  

https://www.youtube.com/watch?v=pG86hhrDdzQ is an okay tutorial on how to sew whip stitch, but please, don’t decide how long your thread should be based on how long the seam is.  That way lies madness, and all the bonus random knots you could ever want.  If your thread goes from your hand (where you’re holding it) to your shoulder, then that’s long enough.  For my first projects, many years ago, I was told to use threads that were only as long as my hand to my elbow – and feel free to do that if you choose.  Shorter threads are not only less likely to tangle, but you sew faster with them, because you’re not spending as much time pulling all that thread through.  If you want to go really fast – most times it is possible to pull through only a little thread after your first stitch, and then make a second one before pulling the thread all the way through.  It can make your thread break a little more often, until you’re used to it though.

https://www.youtube.com/watch?v=mLtGzTgjj3o is another good whip stitch tutorial if you’re less of a beginner, and looking for advice on how to refine your stitching.

https://www.youtube.com/watch?v=INcjixkx66o is an older video, and slightly fuzzy, but it’s a pretty good tutorial all the same in how to hem using whip stitch.

Not *quite* as useful, but another excellent stitch to know is running stitch, shown at https://www.youtube.com/watch?v=nbtapXA44AY .  Running stitch with long stitches is excellent for basting, which, as I said above, is a great way of not getting randomly stabbed.  It also avoids pins that grab and tangle your thread up, or pins that come loose, or do any of the other things that pins do to make sewing harder than it needs to be.  Basting is used to: keep hems in place while you’re sewing them; keep seam allowances even while you’re sewing them; temporarily assemble a garment, or part of a garment while you try it on; and a number of other things. It’s quick and easy to do – just put large (1-3 cm) stitches along the line you want held in place.  Running stitch is also useful for sewing down trims, or the first line of bias or hemming tape, or as a simple embroidery stitch that also keeps things flat.  It’s also useful for gathering, and in other places where whip stitch just isn’t the right thing to do (sadly, this does happen).

Next steps

So you’ve got your supplies, and you’ve practised a stitch till you’re comfortable with it and you really want to get started on your tunic or shirt…

It’s easier to handle smaller pieces of fabric than large ones.  I am, when not writing this article, currently regretting trying to finish a dress in a hurry as I try to tidy up long seams with fabric that does not want to bunch up easily in my hand.  Learn from my mistakes, and seriously consider finishing the edges of your pieces of fabric before sewing them up.  It really does make things easier, and seams that are nice and flat are much more comfortable to wear, and also last longer than unfinished ones.  You can even hem as you go – cut out, say, the sleeves, then hem the sleeves, then cut the body panel, hem the body panel, then sew the sleeves to the body.  Then cut the gores, and… you get the picture.  This way of working is handy if you’re worried about telling all the rectangles apart if you cut them together, and also has the advantage that when you’re sewing the last seam, you usually do not have anything but the hem to do, rather than a whole lot of seam finishing.

Putting  in a hole for your head to go through before you sew the arms on, is also a good idea to make things easier on yourself,  and you’ve probably realised before now that your head is not square or rectangular, and we haven’t talked about how to handle curves.  First – breathe.  Everything is easier when you’re breathing.  Next – look back at your plan we made in step one.  What does your neckline look like in the sketch, or in the notes?  

One  way to finish your neckline is to use a tiny hem.  Put a line of running stitch close to the edge first, because part of your neckline will be on the bias, and that means stretching and fraying.  If you put in a running stitch though, it holds it all nicely in place till you can fold a tiny roll, and whip it in place.

Another fairly easy  way to finish a neckline is to use hemming tape – not the iron on stuff, but the type which is usually next to the bias binding , and is pretty easy to find in a number of colours and fabrics.  First, you line up the edge of your fabric, with the unfolded edge of the tape, and sew it to the garment with a running stitch in the valley made by the fold in the tape. Then you roll the tape over, so the raw edges are sandwiched between the garment fabric and the flat side of the tape, and whip stitch down the other folded edge of the tape.  You can do this so the tape winds up on either side, but I like it on the inside, so I can start and finish the tape at the centre back of the neckline, and thus easily tell which way round the tunic goes.  

A third way is to use a facing.  This is a little more complicated, but gives you a chance to use contrast fabric if you want to.  The easiest way to approach this method is to use a square or rectangle facing, extending a few centimetres past your neckline in all directions.  Then, making sure the facing fabric is exactly where you want it to be, cut a hole the same size as the one on your body panel, so they line up. Then either sew small running stitches about  ½ a centimetre from the cut edge, or turn back the edges of both fabrics and whip them together.  Depending on the fabrics you’ve chosen, you may need to clip the neckline back to your stitching to get it to lie smoothly – but some fabrics will stretch that little bit. Check by pulling the facing fabric through the hole to the other side, and see how smooth it is – if it’s pretty smooth, then  iron around the neckline you’ve just made, if it’s not, clip really carefully to remove tiny triangles of fabric with the point of the triangle close to your stitching, then pull the fabric through again, and iron it nice and flat.  Ironing at this stage will make a huge difference to how good the finished tunic looks, and will make the next bit a bit easier, so it’s well worth doing.  Finally, turn the edges of the facing under, and sew them down all the way round, so the facing doesn’t flap about.  For bonus points, sew a line of running stitch around the neckline, and another one around the facing, so they stay flat and working nicely together, and you’re done.

You’ll see a lot of different shaped facings around, and there’s probably more with the facing fabric on the inside, and you’ll notice that they come in a number of ‘not square’ shapes.  Square is definitely the easiest to do, and this article has ‘for beginners’ in the title, but if you’re feeling really bold, you can try a different shape – the process is the same.    

If you really like the facing technique, you can also use it around cuffs and hems, (and for cuffs, if you accidentally cut your sleeves a bit shorter than you wanted, you can use  the facings to add a bit of length – cut the facings double the finished width you want, plus seam allowances, sew them to the end of your cuffs one side at a time, and no-one will know it wasn’t part of the original plan)
EEEEC: Emrys Grenelef’s Pouch Class

EEEEC: Emrys Grenelef’s Leatherworking Class

Emrys shares his class on leatherworking in the category of education. In his words:

“I had prepared some leather for making quivers or pouches. This was for the Gildenwick event.

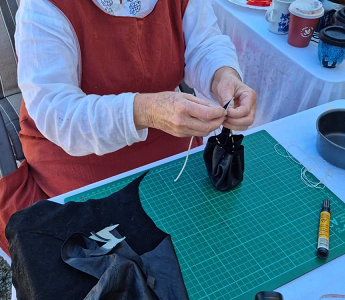
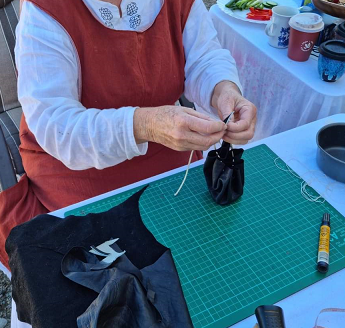
“Not many people attended or had interest but I did manage to guide one person through the making of a basic coin purse (no stitching).

“Method:
The purse shape was traced out on soft leather using a 9inch copper plate. 
This shape was then cut out with scissors.
Marks were made about half an inch in from the edge of the leather and about an inch or in this case 2 finger widths from the previous mark, this ensured even spacing and an even number of holes.
The holes were then punched out with a leather hole punch, hammer and board.
Leather thonging was then cut to length and threaded through.
A leather tab was then marked and cut out of a thicker piece of leather and threaded on to the thonging as a way to tighten the drawstrings. 

“Basic coin purse completed by Mary with guidance.”

EEEEC: Isabel Maria’s Sugarpaste Sotelites

EEEEC: Isabel Maria’s Sugarpaste Carnations & Pomegranate Box

Isabel Maria shares her entry for the categories of luxuriation, degustation, and exploration. As she says:

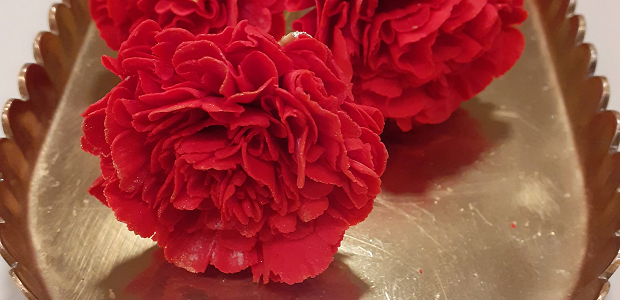
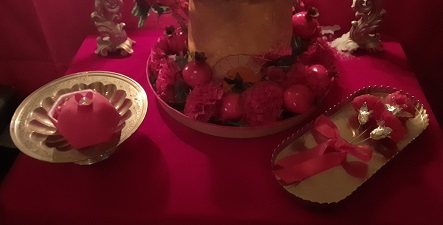
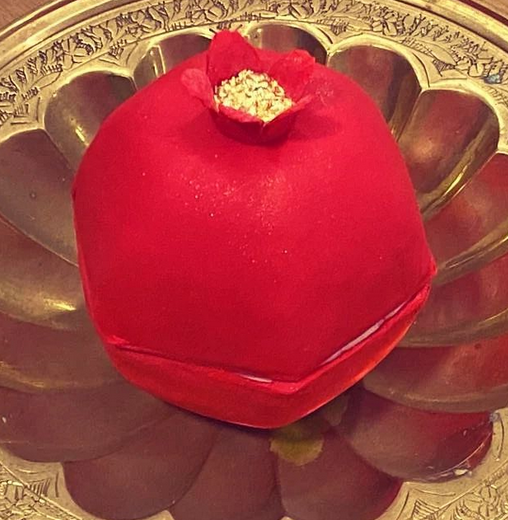
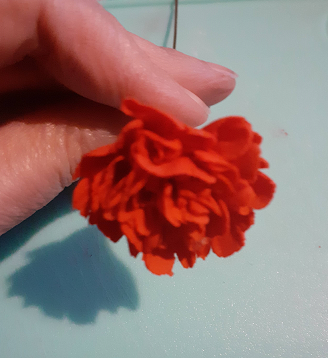
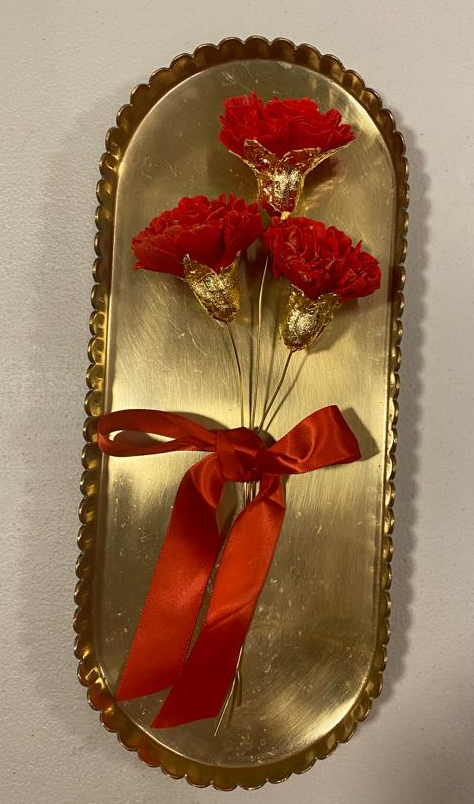
“There was an upcoming event called An Evening in Granada, and the promotional material read “It is 1526 and we invite you to join us in Granada, to celebrate the glad tidings of the nuptials of Carlos of Spain and Isabella of Portugal in an evening of fine food, fine company, and fine entertainment. Rumour has it that this is where the happy couple will be spending their honeymoon!”. As I had offered to make some sotelties to complement the feast and theme, it became obvious that I needed to learn some new skills in order to make the envisaged items; red sugarpaste carnations and a pomegranate decorated with gold leaf.

“Having never gilded anything, nor created anything so fine as carnation petals in the medium of sugarpaste before, I embarked on a journey of research, shopping, bodging equipment to approximate the ‘proper’ tools, and a testing amount of testing to see what worked for me. This was the exploration part of the project.

“Somewhere along this process, the pomegranate became a box to hold actual pomegranate arils and I decided to gild the carnation calyxes. (I’m not entirely sure how that happened.)

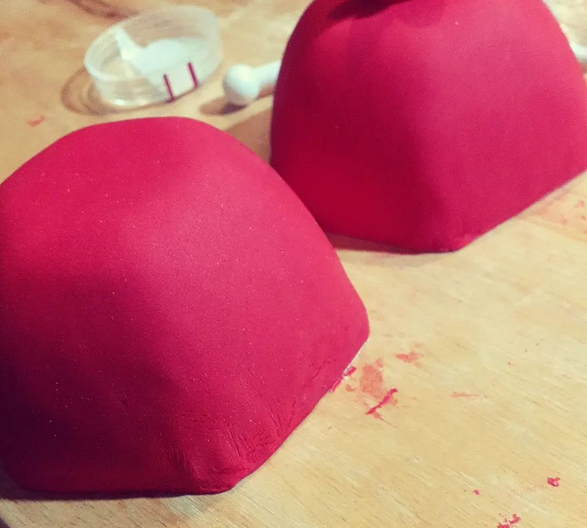
The pomegranate was made by forming the shapes over a suitable shape and allowing them to dry for several days before being removed and allowed to dry further. Once I was comfortable with their structural stability, I added the red ‘skin’ layer, and added the sculpted flower to the top. The gilding was added after further drying, and the application of a little sugar glue.

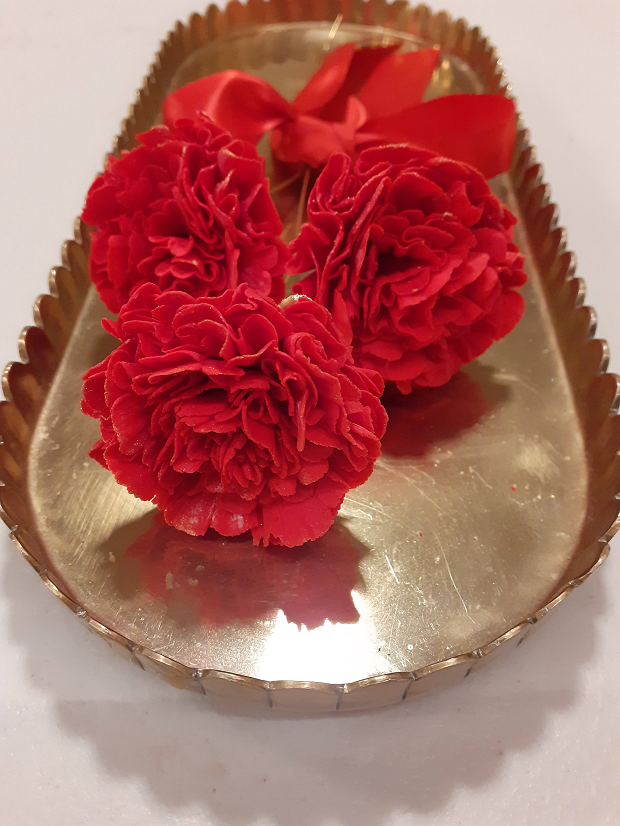
In contrast, the carnations were much more intensive in their construction and were completed over many evenings. Each layer of petals had to be cut out of the paste, then thinned and the edges thinned further until they ruffled. This delicate layer was then added to the wire and allowed to dry overnight before another layer was created and added. The calyx was cut from paste and moulded around the base of the petals when the petals looked sufficiently full and carnation like.

As these sotelties were edible they meet the definition of degustation even though they didn’t really feed anyone (Her Excellency excepted), and were created simply to add glamour and luxury to the event, it is clear they fall into the luxuriation category for this challenge. Which is not to say they didn’t generate a lot of enjoyment in their creation and display.”

EEEEC: Emrys Grenelef’s Limoncello

EEEEC: Emrys Grenelef’s Limoncello

Emrys’s entry is in the category of Inspiration. In his words:

“It started at CF22 when I received a prize from the Fighter Auction Tourney, it happened to be a bottle of Limoncello crafted by Bear Bjarnylr.

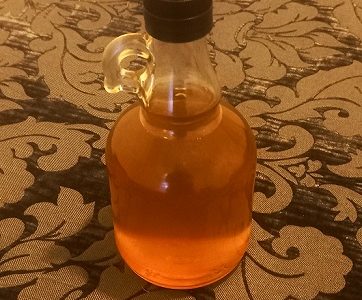
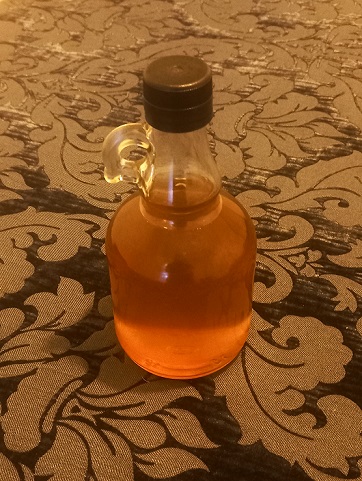
“Gildenwick consumed most of this bottle at a Meade Society meeting, there must have been a couple of hundred mls left over that was decanted into a small “meade” bottle and was then forgotten about.

“This random bottle made it’s way back to a Meade Society meeting at CF23, once I opened this bottle and poured a little in to my vessel, I then remembered what it was. This Limoncello was delicious and Lord Kevin Ost had brought along a couple of buckets of lemons. With these lemons I decided to make a brew as tasty as Bears’.

“The method was fairly basic:

“Peel the rind from half a bucket of lemons ensuring that no pith is added.
Put these rinds into 2 “milk bottles”.
Fill the bottles with 80 proof Vodka over the level of the rinds.
Leave for 2 months in a dark cupboard, inverting/mixing once a fortnight.
After 2 months, strain the rinds from the alcohol and measure the quantity of alcohol (1.25L or 5 cups).
Add to a saucepan 5 cups of boiling water and 5 cups unrefined golden caster sugar. Dissolve the sugar in the water then let cool.
Once cool, add the infused Vodka and stir. Then pour into bottles and keep chilled in the fridge or freezer. 

“This Limoncello was enjoyed at the Gildenwick Collegium during the feast. 

“Another brew was made then enjoyed at the Gildenreef event, during the meade tasting and then the potluck dinner.”

EEEEC: Simon of Cluain’s Viking Hat

EEEEC: Simon of Cluain’s Birka Hat

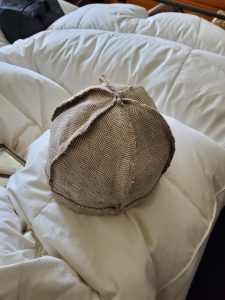
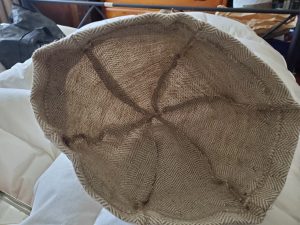
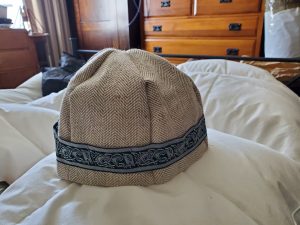
Simon shares his linen hat in the categories of Imitation, Exploration, and Personification

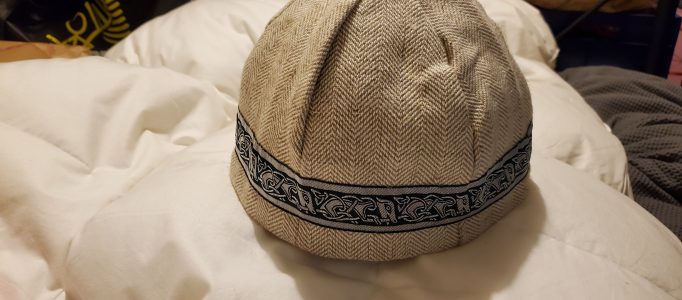
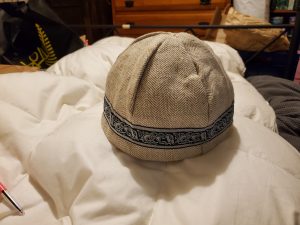
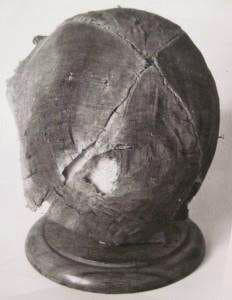
“This is a hat based on as close as I understand materials and construction available to reproduce a hat dug up at the Birka archaeological site. Birka was a Viking settlement on the Swedish island of Björkö located on Lake Mälar.”This is a hat based on as close as I understand materials and construction available to reproduce a hat dug up at the Birka archaeological site. Birka was a Viking settlement on the Swedish island of Björkö located on Lake Mälar.

“I used the research and work of:
Margaret “Mairghread” Wilcox
Festival of the Passing of the Ice Dragon
March 22, A.S. XLVIII (2014)
Barony of the Rydderich Hael

“This informed the design and choices. I used a hounds-tooth weave linen, having discovered a damaged pair of trousers in an op-shop, sensing both an opportunity and the potential of a new hat. The band should show my victory or status, and thus should be archery related, however I had a gorgeous celtic braid so I used that on the first hat I have ever made. Maybe ösenstich or mesh stitch on a future hat.

“The hat made it’s first outing at the wee highland fling. Success if maybe a little loose. Should I defeat a bear in close combat the tension of the hat may be improved by a fur band.”

EEEEC: Ailith & co Wassailing

EEEEC: Ailith Ward Wassailing an Orchard

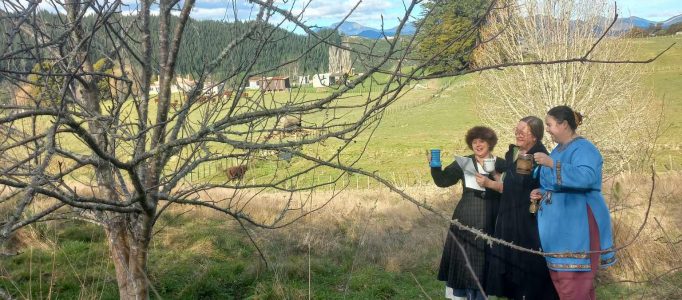
Ailith shares this entry where they, Eryl, Astrid Sudeying, and Emrys Grenelef undertook Wassailing an Orchard under the categories of Participation and Collaboration

On the 19th of July the four of us went wassailing in Eryl’s orchard to encourage a better crop for next year.

Traditionally wassailing in the country was often done on the 5th or the 19th of January just after dinner, near dusk. Pots were banged to scare off malicious spirits or fairies, trees were yelled at and threated into producing even better, and the same trees were wheedled and complimented for the same reason. Food and drink was shared with them. Every village had a different way of wassailing their orchards. In the towns and cities wassailing was a lot like carolling, where groups of poorer folks would go wassailing at peoples doors to bless the home and those within it, and in return the groups would receive food and drink.

We chose the 19th of July for our antics, though for various health reasons we went wassailing after lunch, instead of dinner. We made two wassails, one of cider and one of apple juice, since most of us had to drive home afterwards. The basic recipe for both was to heat the liquid through, adding sugar, chopped apple, orange, and ginger, crushed nutmeg and cinnamon, and whole cloves, all to taste.


We trekked out into the orchid with tankards full of wassail, and blessed every tree, sharing a sip of our drinks with each. Some of the larger trees we sang to, and some we even capered around, ringing bells to attract friendly spirits while driving off any mischievous ones.

EEEEC: Ailith Ward’s Posset

EEEEC: Ailith Ward’s Posset

Ailith presents this entry of an evolution of possets in the category of Degustation

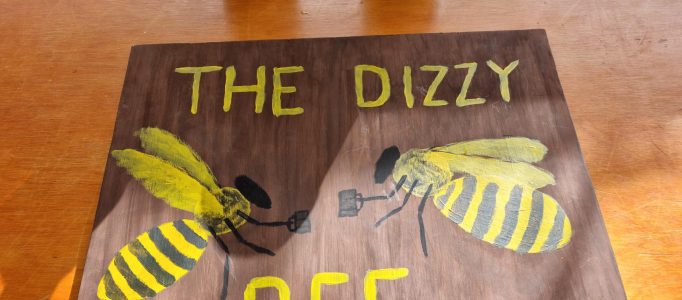
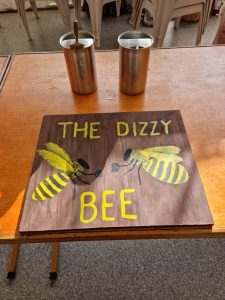
“As some people are aware, I ran a tea tent some afternoons at Canterbury Faire 2023. This led me to put a bit more research into what people further to the west of Europe and in Britain drank to warm themselves of an evening. What I found was Possets. Used as a warm drink, a dessert, and the base for many other recipes, I kept running into the issue of recipe books that would simply say “start with a posset”. But how did I start with a posset when it was too well known for them to even write the recipe down? Limited to Google books and the Gutenburg Project (and similar websites) I eventually found The Closet of Sir Kenelm Digby Knight Opened by Kenelm Digby, published 1669. The book had been written in the 4 or so decades before, and had been published by the author’s son. I reasoned that as a philosopher and not a cook, Sir Digby had almost definitely written down older recipes rather than creating his own versions, and therefore it is extremely likely that his posset recipes are, in fact, period. So, under the sign of the Dizzy Bee, I used his “To Make a Sack Posset” (from page 111) as a base to start trialling possible recipes. 

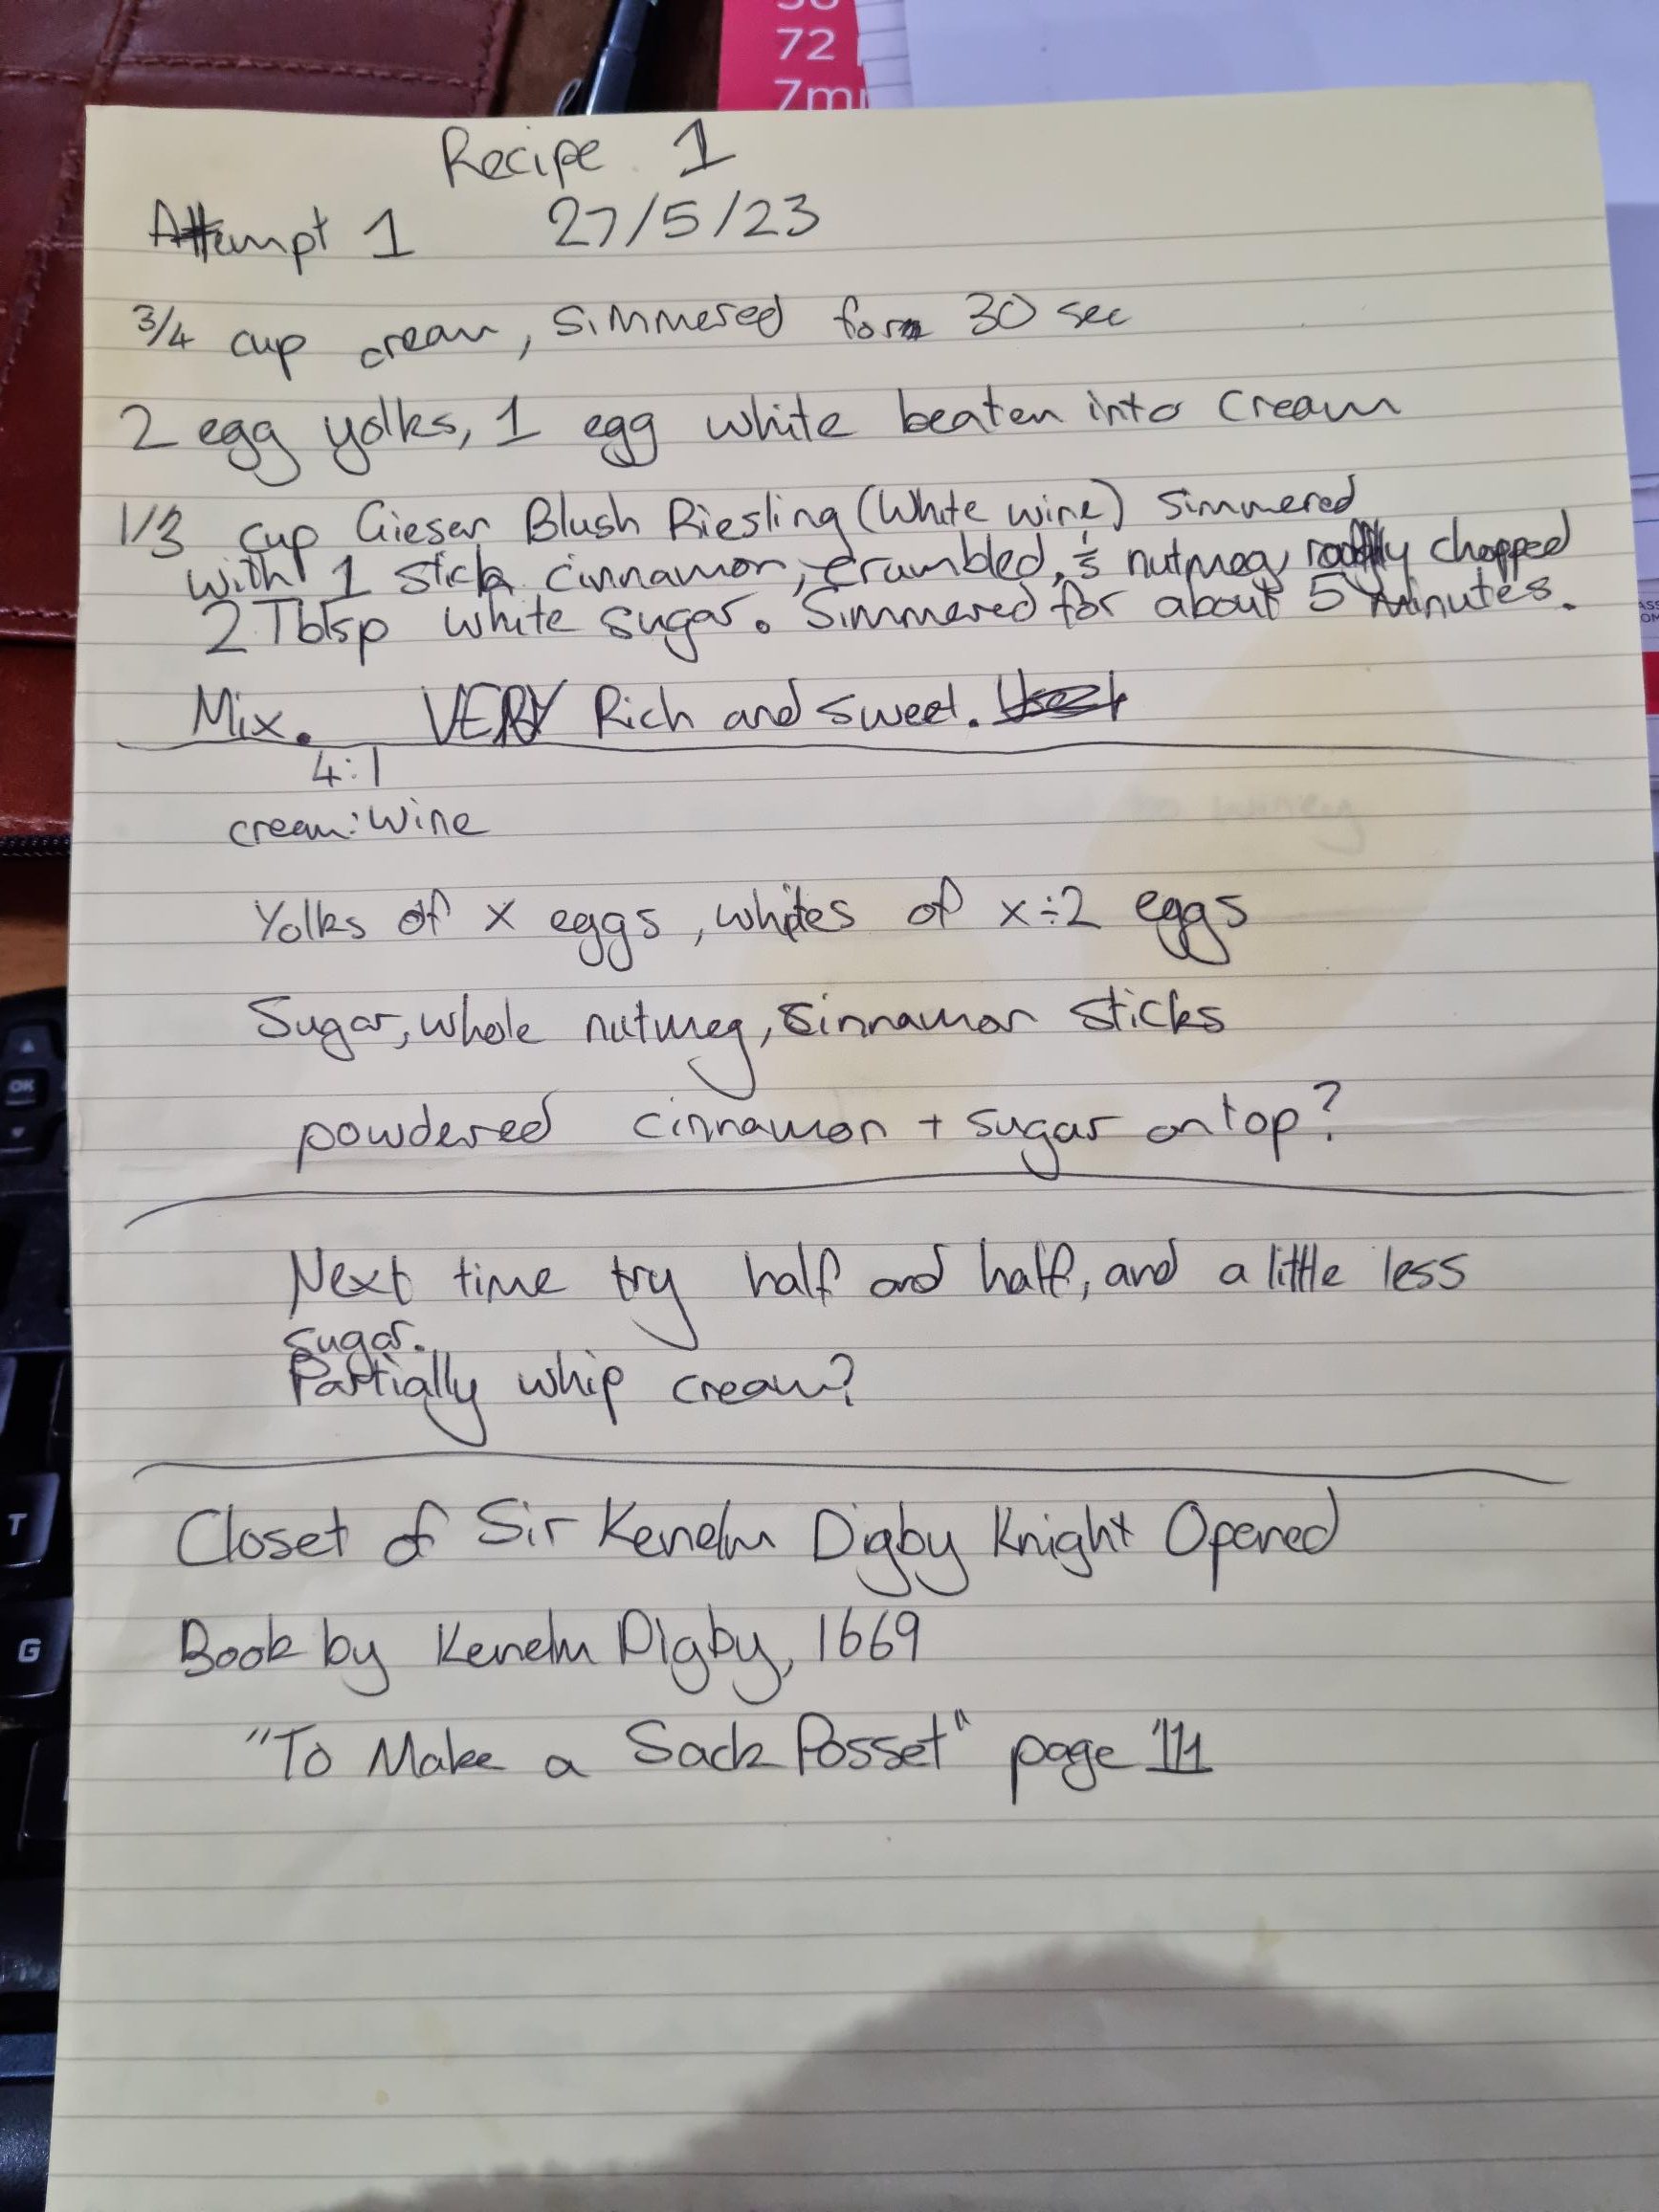
” And so we come to this. What actually is a posset? Well, a posset is a drink that sometimes had solid curds on top of it that could be eaten. It is make from milk or cream, eggs, a white wine or ale, sugar, and varied spices. There were as many different variations as their were cooks. The best description I have been able to come up with is that it is a drinkable custard mixed with a mulled white wine or ale. For those who can read scrawl, I have included my notes from the first few times I tried it, until I came to something simple that I felt was right for me. The notes were written specifically for myself and sometimes reference cooking utensils I have at home, so if something doesn’t make sense, that’s why…”
I presented my final experiment with this particular posset recipe at the A&S showcase at Yule 2023. Many people tried it, and some even came back for seconds :)”

The original recipe:

TO MAKE A SACK POSSET
Boil two wine-quarts of Sweet-cream in a Possnet; when it hath boiled a little, take it from the fire, and beat the yolks of nine or ten fresh Eggs, and the whites of four with it, beginning with two or three spoonfuls, and adding more till all be incorporated; then set it over the fire, to recover a good degree of heat, but not so much as to boil; and always stir it one way, least you break the consistence. In the mean time, let half a pint of Sack or White muscadin boil a very little in a bason, upon a Chafing-dish of Coals, with three quarters of a pound of Sugar, and three or four quartered Nutmegs, and as many pretty big pieces of sticks of Cinnamon. When this is well scummed, and still very hot, take it from the fire, and immediately pour into it the cream, beginning to pour neer it, but raising by degrees your hand so that it may fall down from a good height; and without anymore to be done, it will then be fit to eat. It is very good kept cold as well as eaten hot. It doth very well with it, to put into the Sack (immediately before you put in the cream) some Ambergreece, or Ambered-sugar, or Pastils. When it is made, you may put powder of Cinnamon and Sugar upon it, if you like it. 

Digby, K. (1669). The Closet of Sir Kenelm Digby Knight Opened (p. 111).

Recipe I settled upon:

For 1 cup of cream,  use:

  • half a cup of white(ish) wine
  • 2 egg yolks
  • 1 egg white
  • 1/2 a stick of cinnamon crumbled
  • 1/4 of a whole nutmeg roughly chopped
  • 1 tablespoon honey or sugar

Mix wine, spices, and sugar into a small pot and put on to heat over a medium heat.
In a medium pot simmer the cream for a few minutes, do not allow it to boil. remove the cream from the heat and beat in the egg yolks and white. 
Strain the hot spiced wine and mix into the cream, pouring from a height for aeration purposes.

“I am presenting this as a “completed” A&S project, but as any good cook will know, a project like this will never be entirely completed. Since testing this recipe I have since found actual period sources, plus I want to try it with different types of wine and especially mead. Possibilities are endless with a recipe as open as this.”