
EEEEC: Astrid Sudreying’s Mini-Mask-Making Workshop
Entered under education. Astrid says:
“For Canterbury Faire this year, I wanted to try to teach mask making again. Being that full sized masks take too long, I decided to teach the skills making mini masks, hoping to get through the basic skills within the week.
“The classes were set out in two sessions, that were two hours each. My hope was for the classes to follow the outlines of:
First class:
- short history of the venetian mask & paper mache
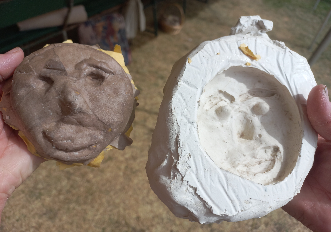
- sculpting in clay
- making a negative mould in plaster.
Second class:
- paper macheing the mask
- painting techniques
“The first class went well and we finished with a little time to spare. The second class, did not go quite according to plan however. We only managed to finish our paper mache, and everyone agreed to finish a bit early as the heat was too much for us to continue. I gave a very quick painting explanation to those left before we all dispersed for cooler environs,”The first class went well and we finished with a little time to spare. The second class, did not go quite according to plan however. We only managed to finish our paper mache, and everyone agreed to finish a bit early as the heat was too much for us to continue. I gave a very quick painting explanation to those left before we all dispersed for cooler environs,
“Although I didn’t get to deliver all the information I was hoping to, I was happy with the turnout for both classes, and impressed with the perseverance of the second day class.”