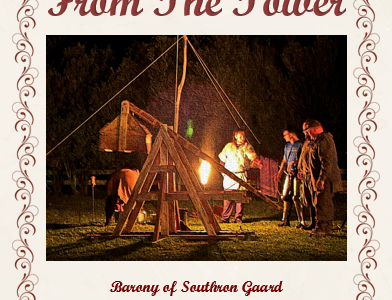
From The Tower February A.S. LIX
Contents:
- B&B, Seneschal, Deputy Seneschal columns
- Officer Introduction – Tour d’Or Herald
- Images from Canterbury Faire
- Draft Council Minutes from January meeting


An entry for Personification, Transformation, Imitation and Preparation is described by Emrys:
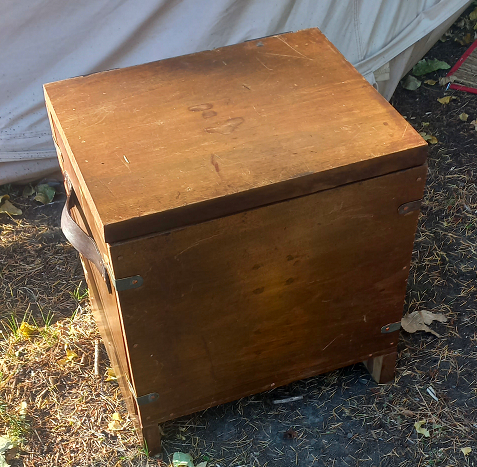
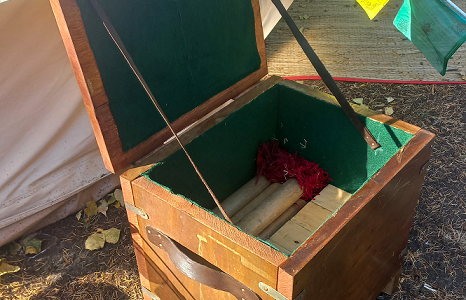
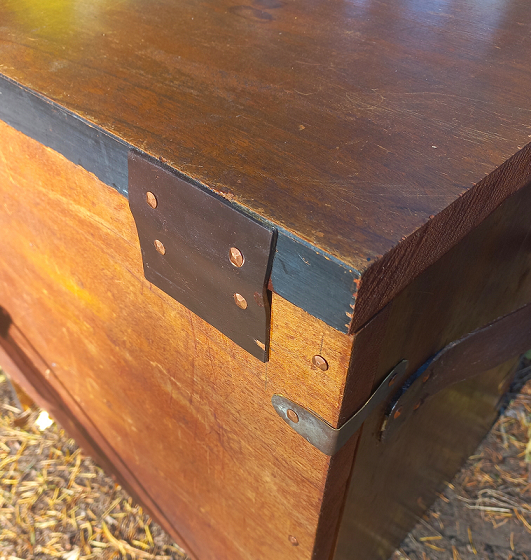
“We had some old timber lying around from a dismantled piano. The timber was a little rough but the 2 boards were over a foot in width so I decided to upgrade my Kubb box. I went with a basic six-board chest.
“I based my design on the six-board chest found: https://www.greydragon.org/library/chests.html“I based my design on the six-board chest found: https://www.greydragon.org/library/chests.html
I cut each board into thirds, this left me with six boards at 420mm x 350mm x 25mm.
I then cut two notches (350mm x 25mm) out each side of the two side boards, to act as a shelf for the front and back boards.
The bottom board was trimmed to 370mm x 300mm x 25mm.
I then nailed the five boards together using square copper nails.
I found some old wood stain and stained the visible cut edges of the boards.
Next I got an old sheet of brass and cut out eight reinforcing straps, this brass looked aged and I left it as such.
I then got some heavy weight leather and cut out two pieces for handles and two pieces for hinges and then dyed them with a generic dye from Mister Minit.
I cooked a small batch of rabbit skin glue and glued the leather in place.
Then I nailed all the straps, handles and hinges in place and bent over any nail tips that were protruding.
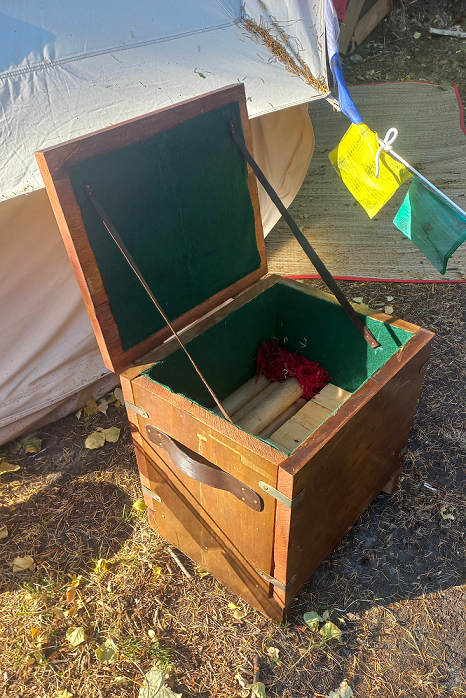
Next was laying the felt inside the chest, I bought some cheaper felt blend from spotlight but the widths that were on offer meant that I couldn’t lay one piece inside the chest and had to settle for two pieces on the inside and two pieces for the lid.
I then made another larger batch of rabbit skin glue and glued down all the felt.
Lastly I cut out two light weight pieces of leather for stays and nailed them in place to the lid and the side boards.
The chest is a little rough around the edges but serves well as a Kubb set holder and a seat.
I am looking forward to making a larger, grander chest.
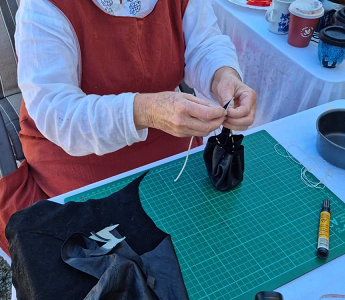
Emrys shares his class on leatherworking in the category of education. In his words:
“I had prepared some leather for making quivers or pouches. This was for the Gildenwick event.
“Not many people attended or had interest but I did manage to guide one person through the making of a basic coin purse (no stitching).
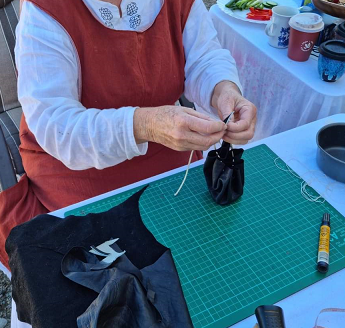
“Method:
The purse shape was traced out on soft leather using a 9inch copper plate.
This shape was then cut out with scissors.
Marks were made about half an inch in from the edge of the leather and about an inch or in this case 2 finger widths from the previous mark, this ensured even spacing and an even number of holes.
The holes were then punched out with a leather hole punch, hammer and board.
Leather thonging was then cut to length and threaded through.
A leather tab was then marked and cut out of a thicker piece of leather and threaded on to the thonging as a way to tighten the drawstrings.
“Basic coin purse completed by Mary with guidance.”